Adding Consecutive Months to an Existing Claim in VaCMS |
About
In instances where workers need to add consecutive overpayment months to an existing claim in VaCMS, a claim modification can be conducted by editing the existing claim.
NOTE: If consecutive overpayment months need to be added to an existing claim with the same Claim Type as the existing claim, then workers can edit the existing claim from the View/Track Claims page. However, below are exceptions where a new claim will need to be added:
If consecutive months need to be added to an existing claim with a different Claim Type than the existing claim, then a new claim will need to be added from the View/Track Claims page.
If an existing claim is non-trafficking and a new claim is trafficking, then a new claim will need to be added from the View/Track Claims page.
If an existing claim has a Claim Type as Inadvertent Household Error and a new claim is pending a fraud determination, then a new claim will need to be added from the View/Track Claims page with a Claim Type as Inadvertent Household Error until the fraud determination is made.
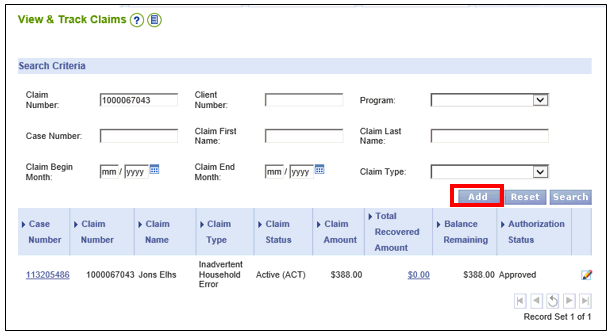
NOTE: Workers should not select Add from the View/Track Claims page. If Add is selected from the View/Track Claims page when attempting to add months to an existing claim, workers will be directed to a blank Claim Information page.

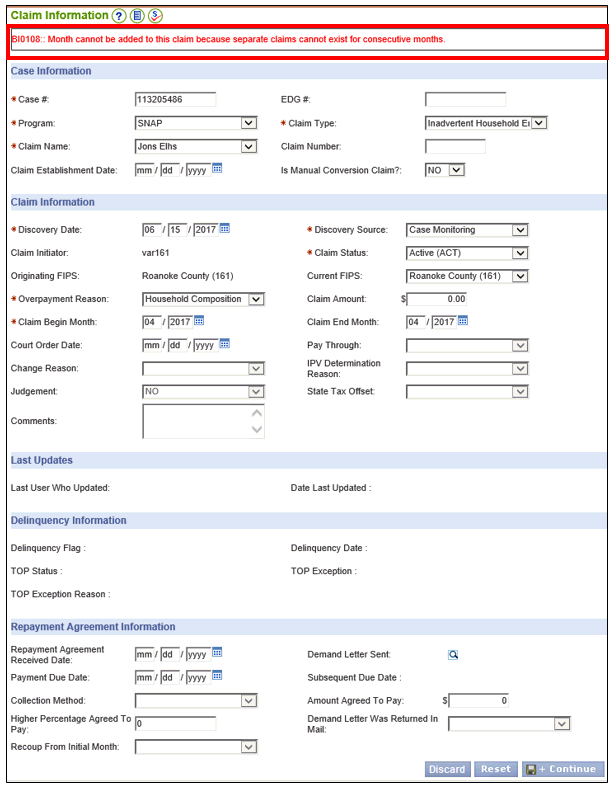
Should you select the Add button on the View & Track Claims page, once the Claim Information page displays and workers enter a Claim Begin Month that is the first month of the consecutive months being added to the existing claim, the following error message displays: BI0108:: Month cannot be added to this claim because separate claims cannot exist for consecutive months.
Adding Consecutive Months to an Existing Claim in VaCMS
Follow the steps below to add consecutive overpayment months to an existing claim with the same Claim Type:
From Left Navigation, select Benefit Issuance, Claims, and then View/Track Claims.
On the View/Track Claims page, enter the necessary fields in the Search Criteria section.
Click Search and the existing claim should display in the search results.
Click the edit icon (pencil) next to the existing claim.
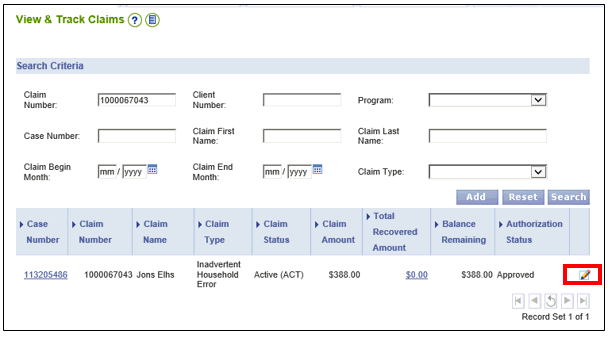
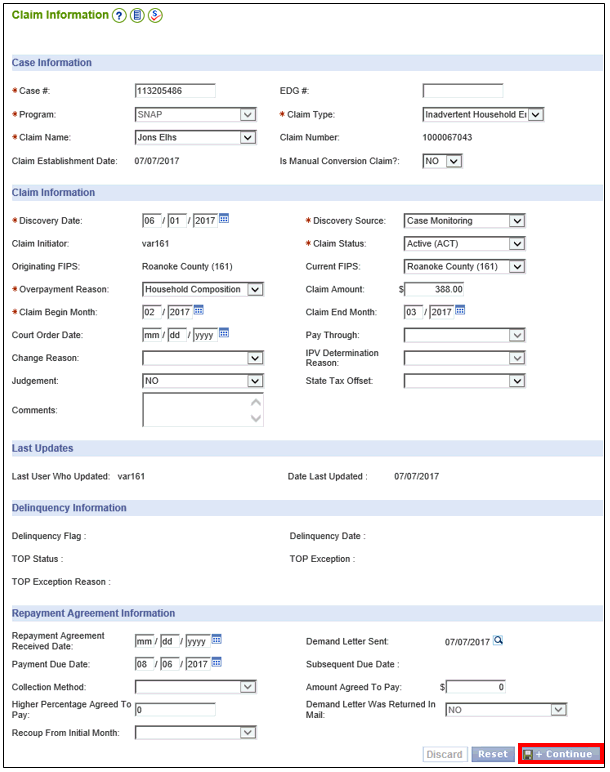
The Claim Information page displays.
Click Save + Continue.
The Overpayment Calculation page displays.
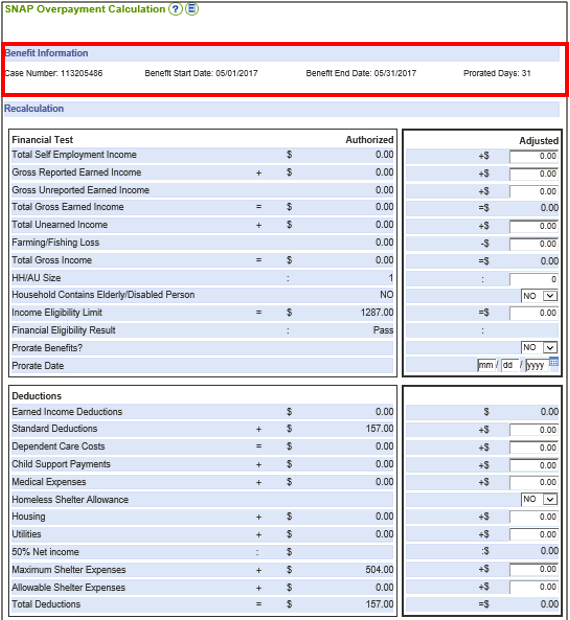
It’s important to pay attention to the Benefit Information section of the page. Once the Overpayment Calculation page displays, the Benefit Information section defaults to the first overpayment month for the exiting claim.
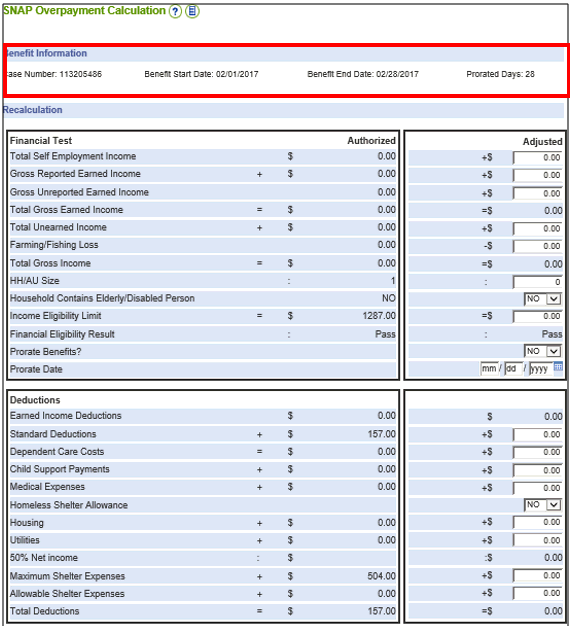
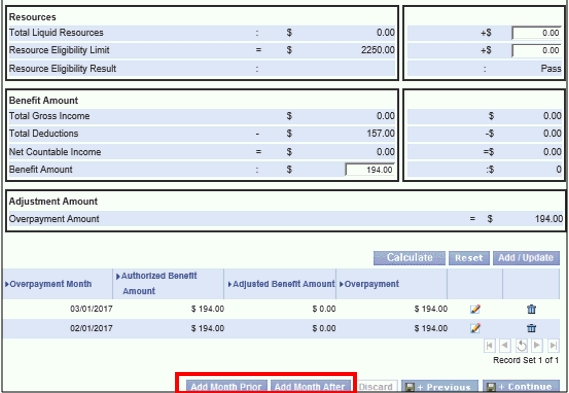
Select Add Month After at the bottom of the page.
The Benefit Information section automatically updates the Benefit Start Date and Benefit End Date fields with the next consecutive month after the last Overpayment Month of the existing claim.
Enter the adjusted information on the right-hand side Adjusted column.
Select Calculate. The Overpayment Amount under the Adjustment Amount section will automatically calculate the adjusted amount.
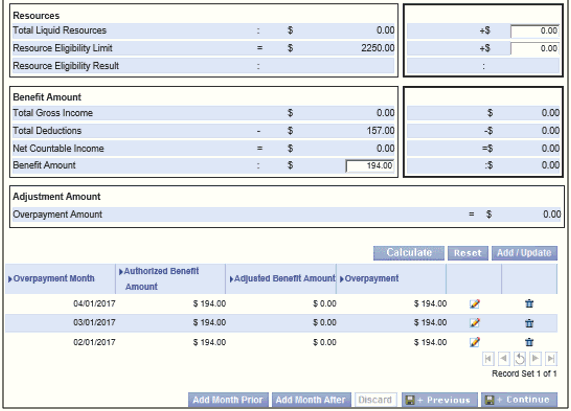
Select Add/Update. The newly added Overpayment Month and Overpayment Amount will be added to list of existing Overpayment Months at the bottom of the page.
Select Add Month After again to add the next consecutive overpayment month.
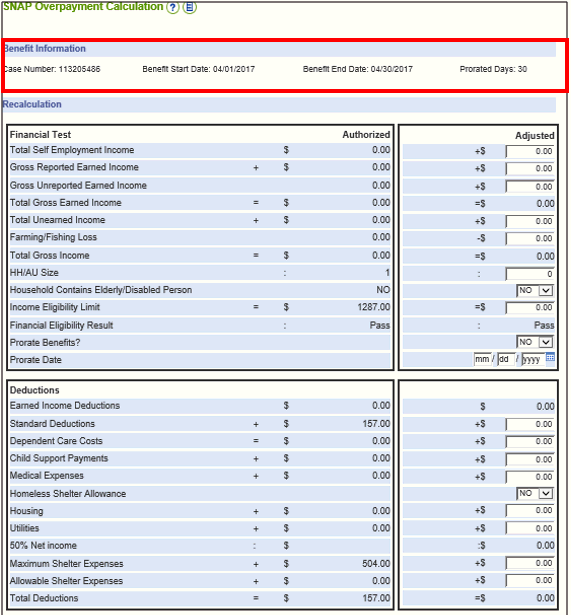
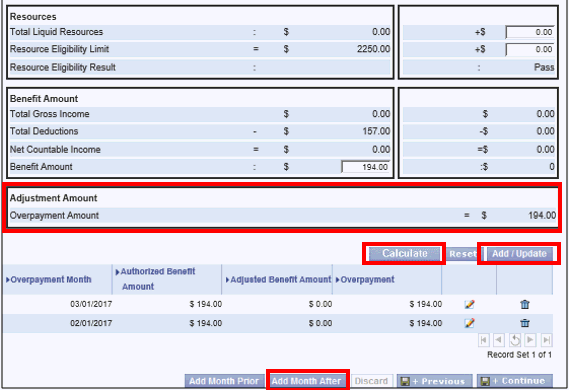
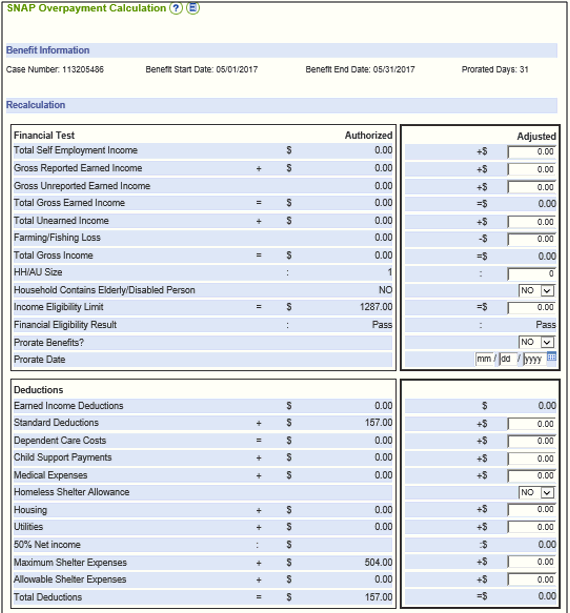
Upon selecting Add Month After again, the Overpayment Calculation page resets with the Benefit Information section automatically updating the Benefit Start Date and Benefit End Date fields with the next consecutive overpayment month after the overpayment month just entered.
Enter the adjusted information on the right-hand side Adjusted column.
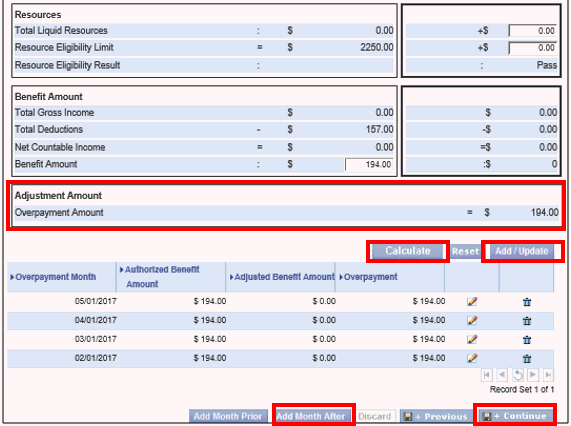
Select Calculate. The Overpayment Amount under the Adjustment Amount section will automatically calculate the adjusted amount.
Select Add/Update. The newly added Overpayment Month and Overpayment Amount will be added to list of existing and newly added Overpayment Months at the bottom of the page.
Select Add Month After again to add the next consecutive overpayment month, if needed.
Follow steps #13-16 to keep adding consecutive overpayment months to the existing claim.
Once all overpayment months are added, select Save + Continue.
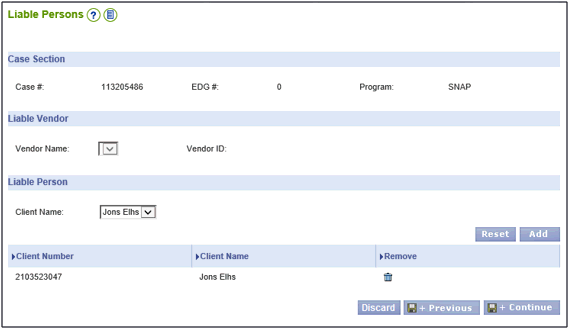
The Liable Persons page displays. Select Save + Continue.
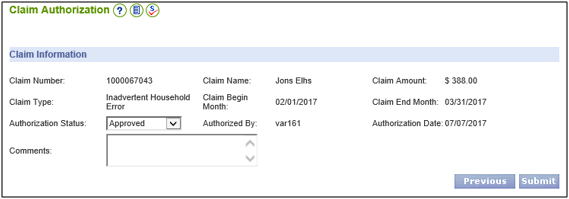
The Claim Authorization page displays. Select the appropriate status from the Authorization Status dropdown menu, enter any additional comments, and click Submit.
Updated: 07/17/2017